McGyver Heel Lock: EVA Pads + Tape for Expedition Boots
Disclosure : This post contains affiliate links. As an Amazon Associate I earn from qualifying purchases — at no extra cost to you.
I only recommend gear I personally use or have tested.
If you want expedition boots that fit while living in Saskatchewan… prepare for war.
Training for 6000–7000m objectives while living in Saskatchewan forces you to solve problems most mountain towns never have to think about.
Boot fitting isn’t a retail experience. It’s a systems challenge. And systems don’t care about marketing claims.
If you live more than two hours away from a serious alpine shop, budget for shipping, returns, and emotional damage.
If you’re in Drummondville at 23:14 googling “G2 Evo heel lift even when tightened” after buying four pairs and testing them on bubble wrap in your hallway — This isn’t a NASA-level engineering failure. Not automatically the wrong size. It’s usually a volume problem.
Stop Thinking Heel Lift = Wrong Size
Heel lift ≠ automatically too big.
Most of the time, it’s a rear-volume mismatch at the ankle pocket — not a length issue.
Before you size down and destroy your toes, check the volume.
If you’re unsure about length, confirm toe clearance first. Toe bang in cold = damage.
The Real Problem: Rear Volume
Most expedition boots are built around male volume patterns. If that’s not your morphology, the problem isn’t you. The last isn’t universal. Your foot isn’t wrong.
If you have:
§ narrow heel
§ low ankle volume
§ normal forefoot
Welcome to McGyver mode.
Focus first on getting the correct length for your toe box.
Toe bang in cold environments is not negotiable.
Personally, I had to go 2.5 EU sizes up from my street shoe size to avoid compression on descent. I ordered three pairs and returned two.
Find the right length first.
Rear volume can be modified. Length cannot.
This distinction alone would have saved me hundreds in shipping fees.
McGyver Mode (EVA > Panic)
Instead of panicking, solve the system.
Here’s what worked:
§ U-shaped EVA pads around the malleoli on the outside of the liner, not inside against your foot (Amazon link)
§ Lateral and medial support
§ Heel lock without crushing the instep
§ RockTape or Leukotape K (Amazon link)
§ No permanent glue (future you will thank you)
Avoid adding material on the instep. If you feel dorsal pressure or numbness: remove material. Instep is not the place.
It increases pressure on the dorsal nerves and compromises circulation — exactly what you don’t want in extreme cold.
Properly placed U-pads stabilize the heel without compressing the top of the foot.
Just make sure they don’t sit directly over the malleoli.
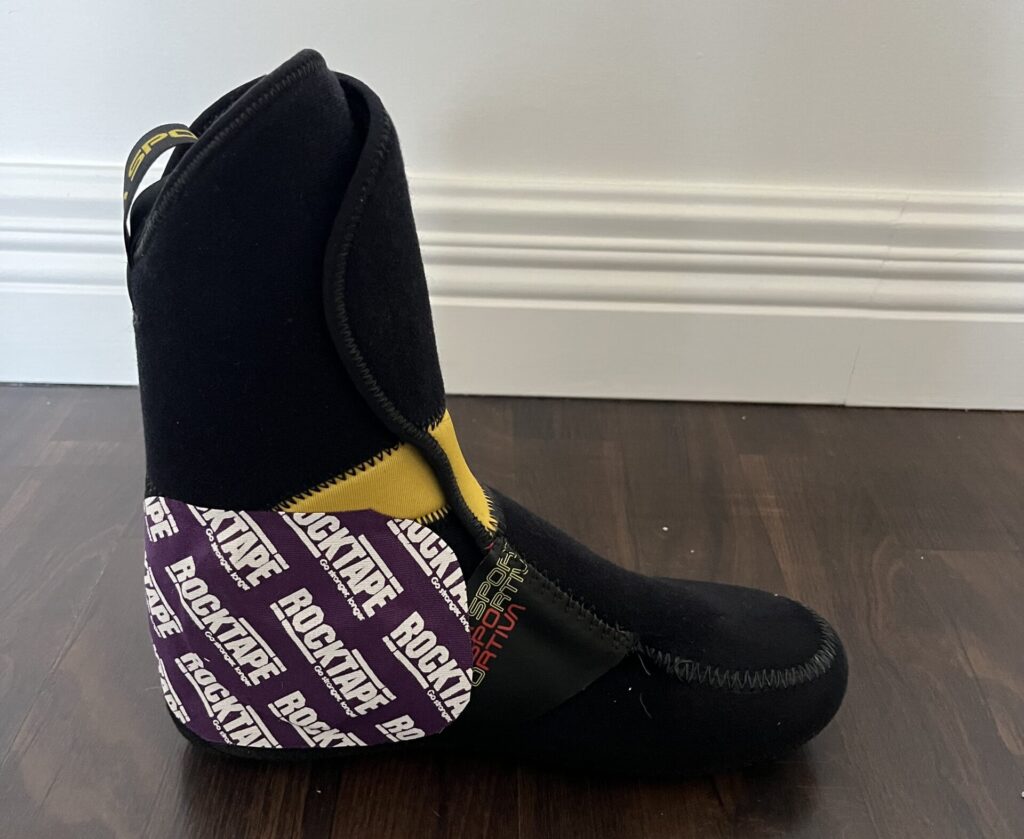
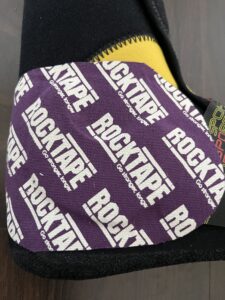
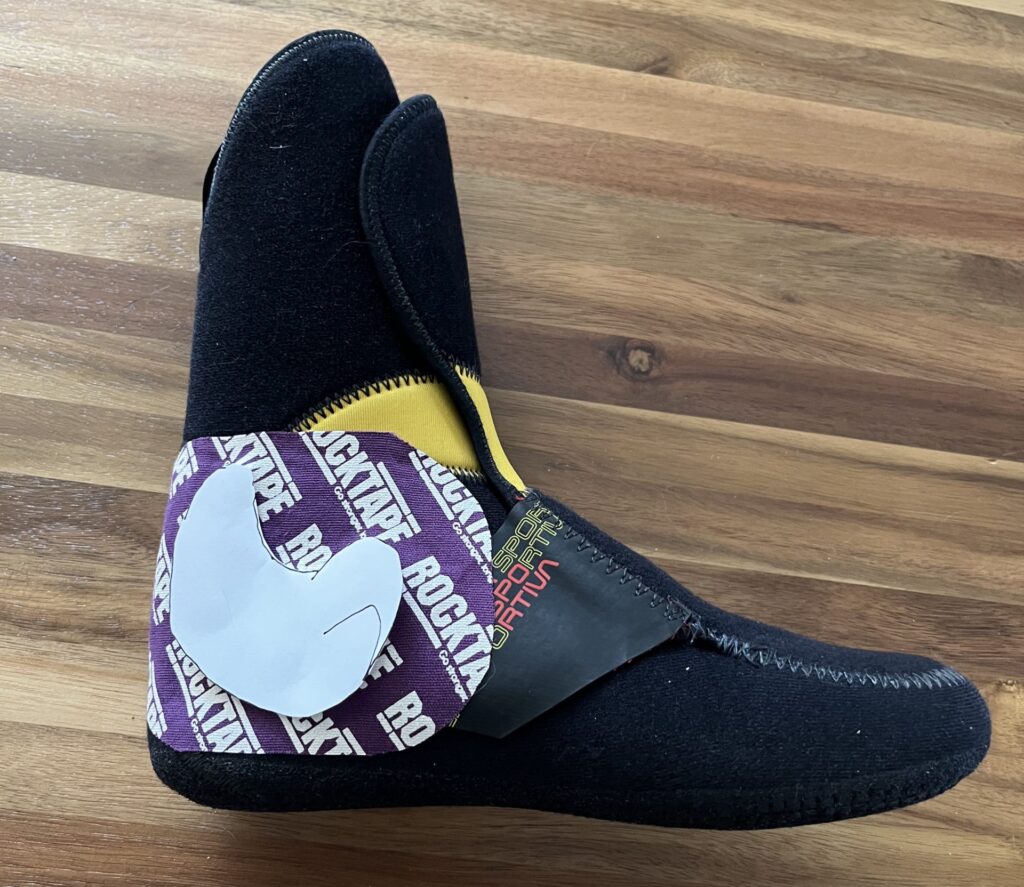

Heel locked. Instep untouched. RockTape wrap + EVA U-pad placement. (Paper templates = U-pad shape guide.)
Functional > Perfect
Expedition boots are not slippers. They’re tools.
You’re optimizing for:
§ Stability under load
§ Cold tolerance
§ Heel retention
§ Technical performance
Not comfort or aesthetics.
Test carefully on protected surfaces.
Your return policy deserves respect.
If you can:
§ descend without toe bang
§ front-point without heel lift
§ walk 1h without numbness
You’re done.
Cut the tag.
Optional Ritual
Go grab your RockTape, your scissors and press play.
And maybe get some $0.65 ramen.
Expedition prep isn’t glamorous. It’s iterative.
And expedition boot fitting isn’t about comfort.
It’s about constraints, trade-offs, and accepting that no one is overnight shipping a custom solution to the Canadian prairies.
System integrity matters more than aesthetics.
Gear Used

Tools: EVA foam, kinesiology tape, scissors. Optional: $0.65 ramen (moral support).
§ Kinesiology tape (RockTape / Leukotape K)
§ Scissors
§ Optional: ramen